A Groundhog Burrow, Holes in the Wall, and Soil That Kept Disappearing
Soil behind a canal seawall in Harrison Township kept disappearing. A groundhog had burrowed through roughly 30 feet of it, and holes in the aging seawall were letting lake water wash the ground out from behind the wall. We stabilized the affected section by injecting polyurethane from the mud line up to final grade.
At a Glance
Location: Harrison Township, Michigan — property on a canal
Length treated: Approximately 30 linear feet — the affected section of a longer seawall
Problem: Ongoing soil loss and ground instability behind the seawall, concentrated in its most deteriorated section
Contributing conditions: An aging seawall with holes letting lake water in onto the land side, and a groundhog burrow running the length of the affected section
What the homeowner had already tried: Adding pea stone and soil to keep filling the voids — the animal kept digging it back out, and lake water coming through the holes kept washing it out
Safety concern: The holes left by the burrowing and the erosion were a hazard to walk on — soft spots underfoot, and sinkholes a foot could go into
Material: Dual component polyurethane, certified to NSF/ANSI/CAN 61 for contact with drinking water, injected into the ground
Why this method: Chosen for the site conditions and the client’s budget — seawall replacement was not on the table
Method: Injected from the mud line and worked up to final grade, filling voids and cavities the whole way
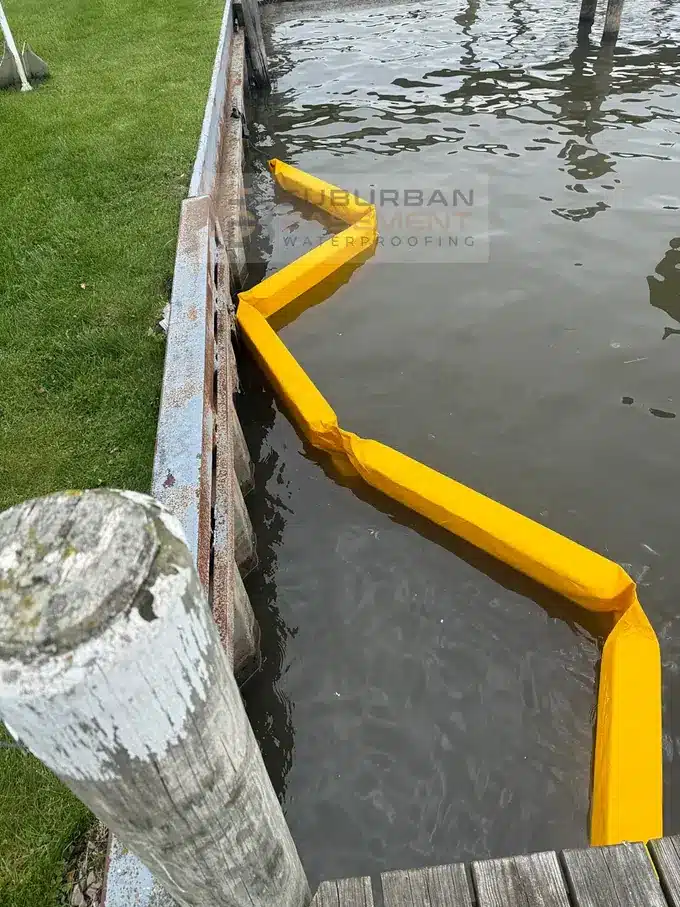
Waterway protection: A turbidity barrier set in the canal before grouting, to contain any foam that surfaces and allow it to be removed from the water
Why bottom to top: The same sequence used on crack repair and curtain grouting — bottom up, every time. Here it also pushed water up and out ahead of the material
Second outcome from the same work: The injection also filled many of the holes in the seawall — the same holes the lake water had been coming through
Result: Ground stabilized and the voids filled
Homeowner’s priority: Stabilized and void filled first — then he planned to bring in soil and regrade everything
Not replaced: The seawall will still need replacing eventually. That was understood going in — the repair gives the homeowner additional years before a full replacement is needed
The Call
A homeowner on a canal in Harrison Township contacted Suburban Basement Waterproofing about ongoing soil loss behind his seawall. Despite repeated efforts to rebuild the area himself, the ground kept eroding.
What We Found
Two conditions were working against this property at once.
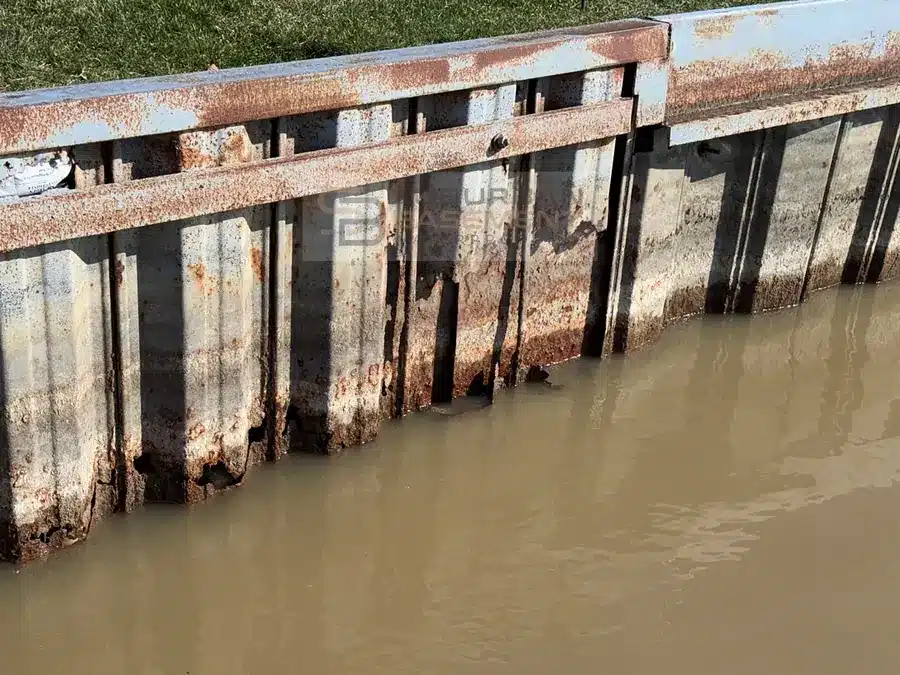
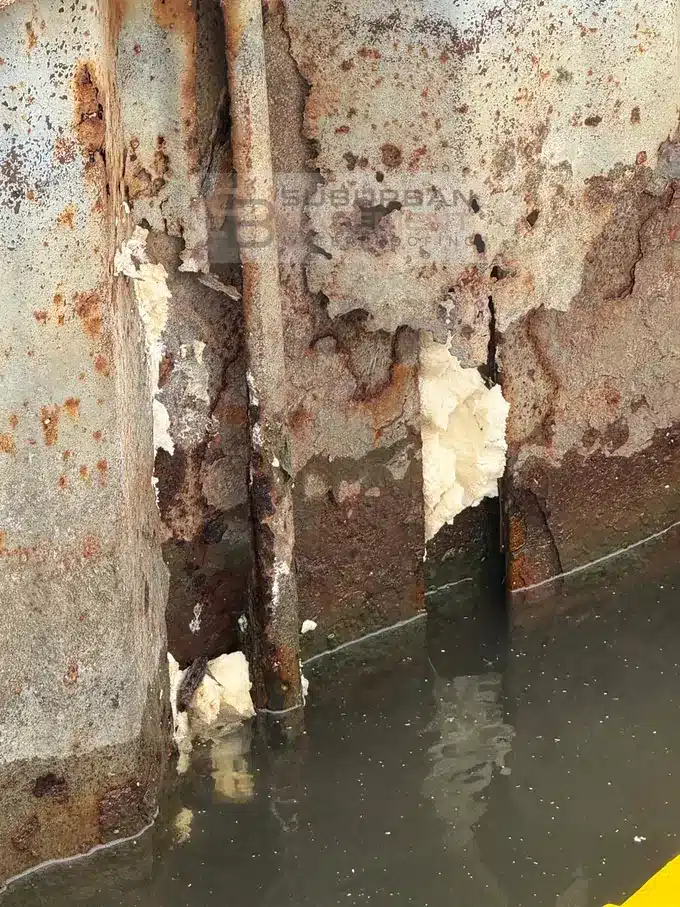
The seawall is aging. It is going to need replacing eventually, and it had holes in it that were letting lake water in through the wall onto the land side.
A groundhog had burrowed along the affected run of the seawall — approximately 30 linear feet. That section is part of a longer seawall, but it was the bad area. The groundhog itself was not present during the repair. What it left behind was.
The homeowner had already tried the obvious fix. He had been adding pea stone and soil to keep filling the voids — the ones the animal left behind as it burrowed, and the ones left by washout from lake water coming in through the holes in the seawall.
It would not stay. The animal kept digging the new soil back out, and the water kept washing it out.
It had also become a safety problem. The holes left by both the burrowing and the erosion were a hazard to walk on — a soft spot underfoot at best, and at worst a foot going into a sinkhole and a severe injury.
Why We Used Polyurethane
Given the site conditions and the client’s budget, we opted for dual component polyurethane on this project. Replacing the seawall was not on the table. The repair had to stabilize what was already there.
The material is injected into the ground itself, filling the voids and cavities behind the wall.
Because this work is done in and alongside open water, the polyurethane we use on seawalls is certified to NSF/ANSI/CAN 61 — the standard for materials that come into contact with drinking water.
Why We Start at the Bottom
We inject from the mud line and work up. That is not something we do only on seawalls — it is the same sequence we use on a crack repair and on curtain grouting. Bottom to top, every time.
On this job it mattered more than usual. Lake water was coming in through the holes in the seawall, so there was water in the ground we were injecting. Starting at the mud line pushes that water up and out ahead of the material instead of trapping it.
It is how I was taught, and it has been the method on every injection we have done since.
Protecting the Waterway During the Work
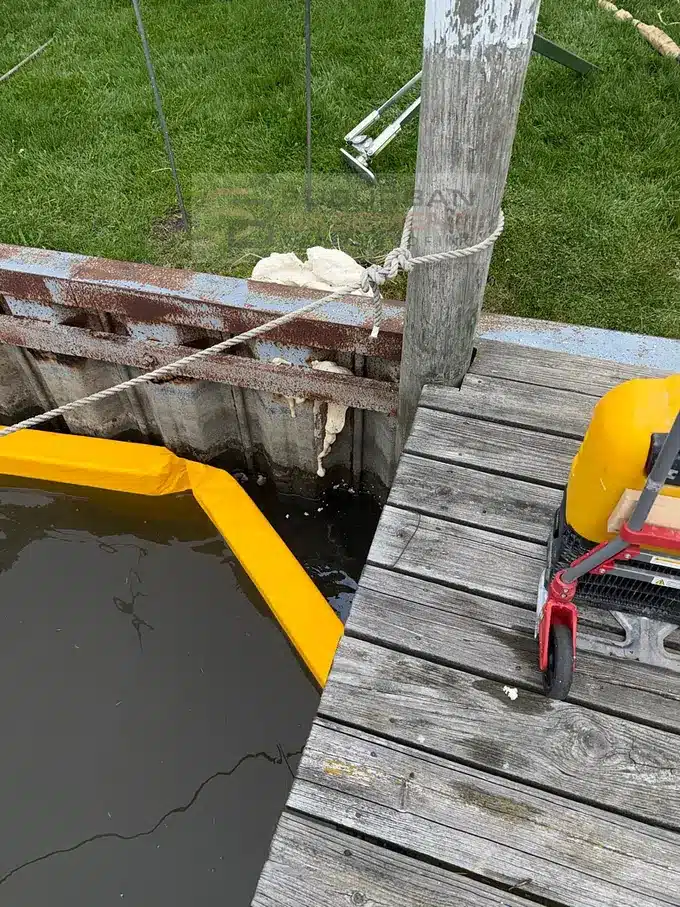
Before any grouting started, we set a turbidity barrier in the canal along the work area. We do this on any body of water we work on.
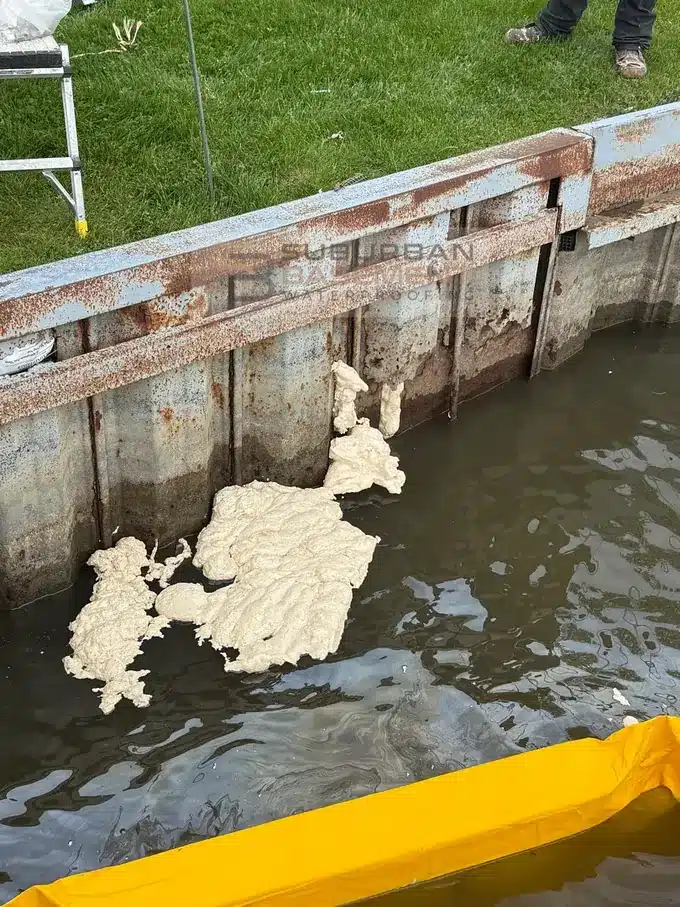
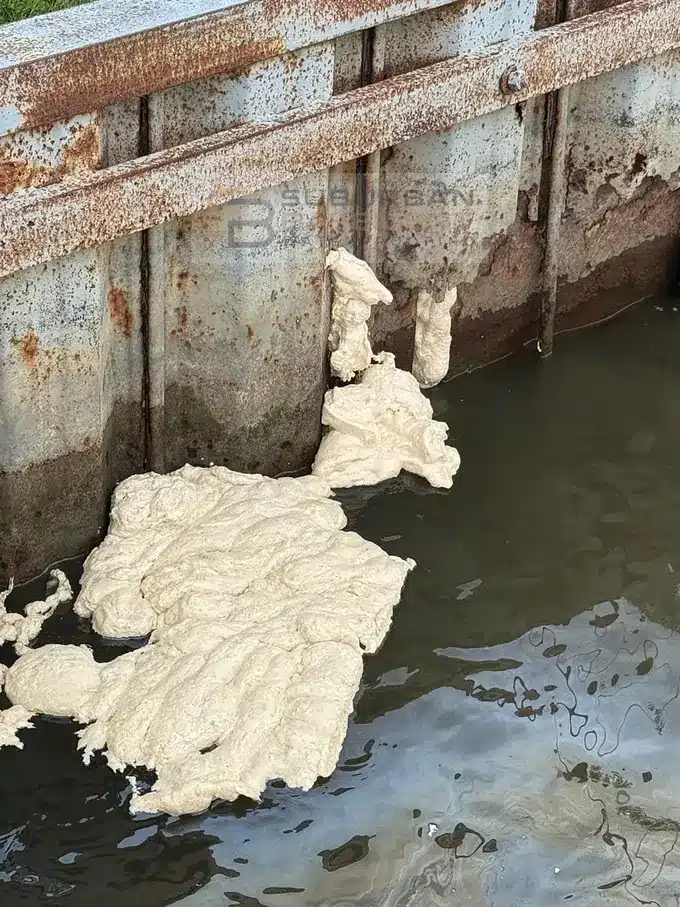
Foam can come up — from the mud line, or anywhere along the seawall. The barrier contains it, and it lets us lift the debris straight out of the water rather than letting it move off down the canal.
Before injecting, we also pretreat the surfaces around each area we plan to inject with a release agent, so any foam that reaches something it shouldn’t can be cleaned off easily.
What We Did
We injected from the mud line and worked our way up to ground level, or final grade — filling voids and cavities the whole way up, across the 30-foot section.
A second result came out of the same work. As the material was placed, it also filled many of the holes in the seawall — the same holes the lake water had been coming in through. That was addressed by the same injection, without a separate operation.
The Result
By the time the work was complete:
The ground behind the seawall was stabilized
The voids were filled across the full 30-foot section, from the mud line up to final grade
Many of the holes in the seawall were filled, cutting off the paths lake water had been coming in through
The homeowner wanted the ground stabilized and the voids filled first. Once that was done, he planned to bring in soil to fill the areas and regrade everything up to the level of the seawall.
The seawall will still need replacing at some point. What this repair did was stop the soil loss and stabilize the ground behind the wall, so the grade he put back had something solid under it — and it gives the homeowner additional years before a full replacement is needed.
Project Photos
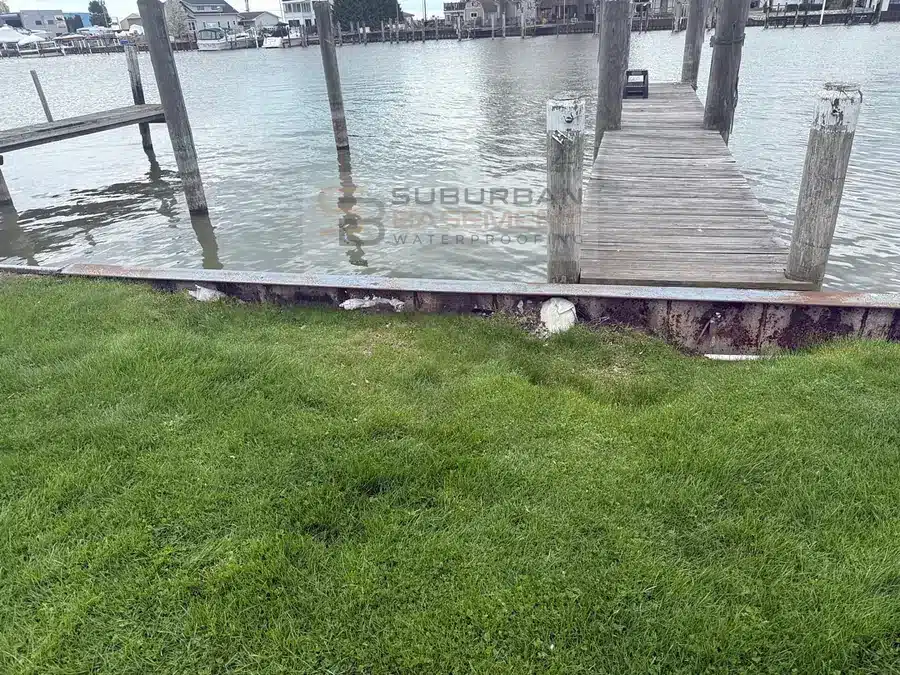
The affected section of seawall along the canal, before grouting.
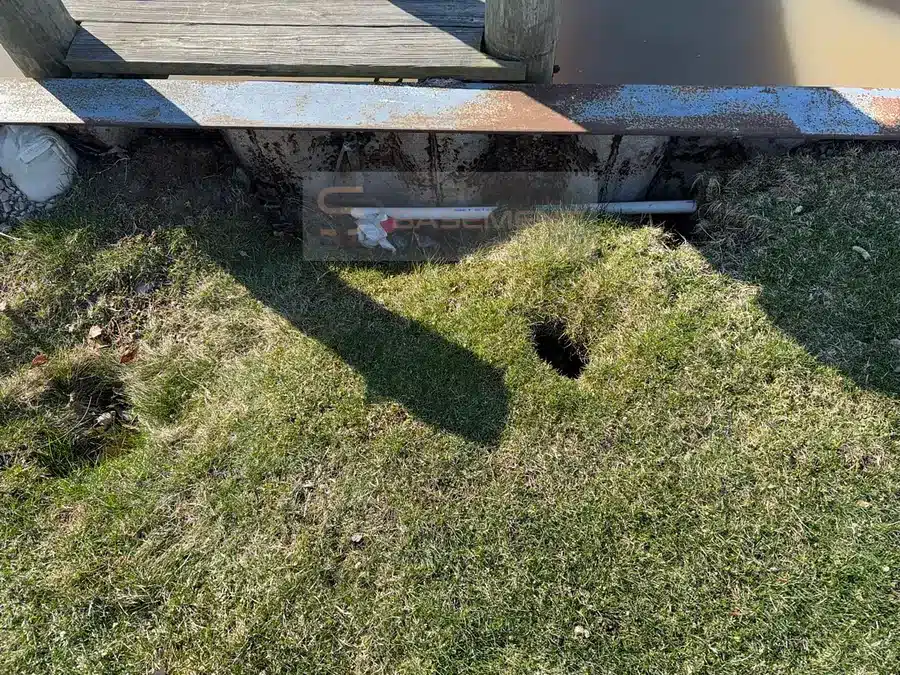
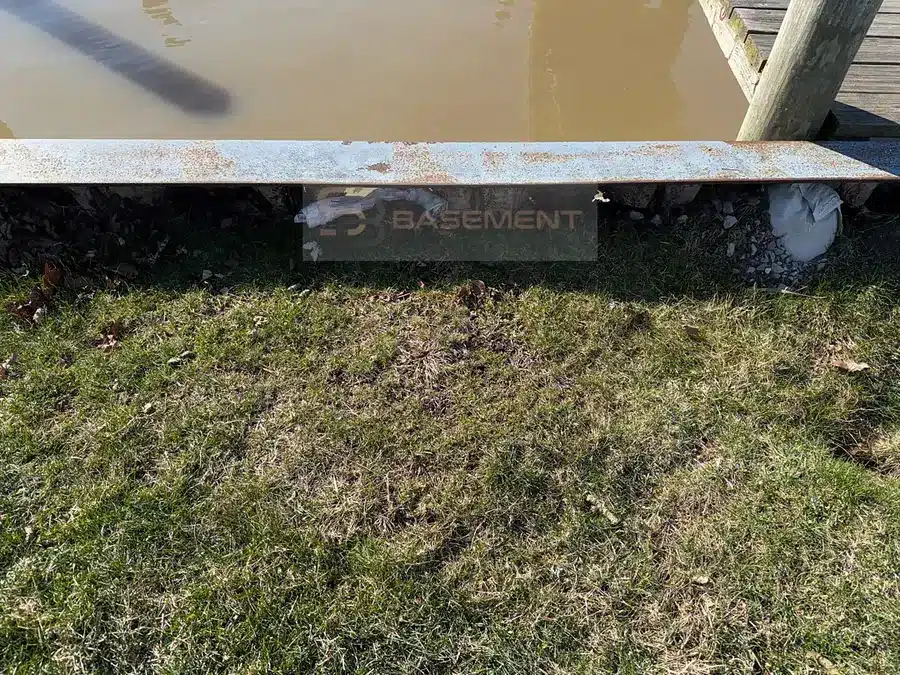
An open sinkhole in the lawn at the seawall, with the ground undercut beneath the wall.
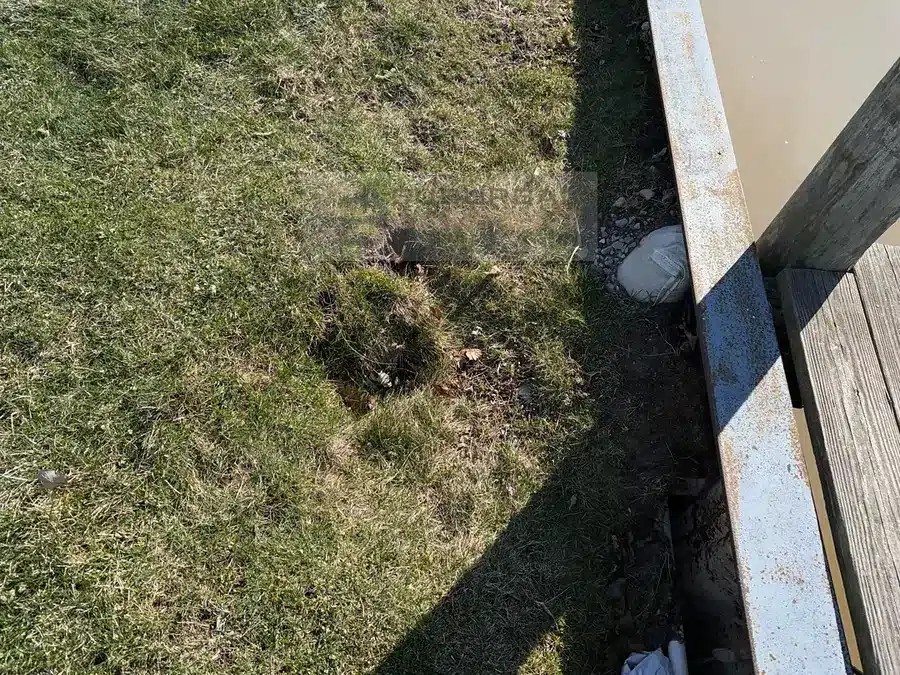
Voids and soft spots in the lawn along the affected run.
Holes through the seawall at the waterline, on the canal side.
The ground undercut behind the wall, with daylight showing beneath it.
The turbidity barrier set in the canal before any grouting started.
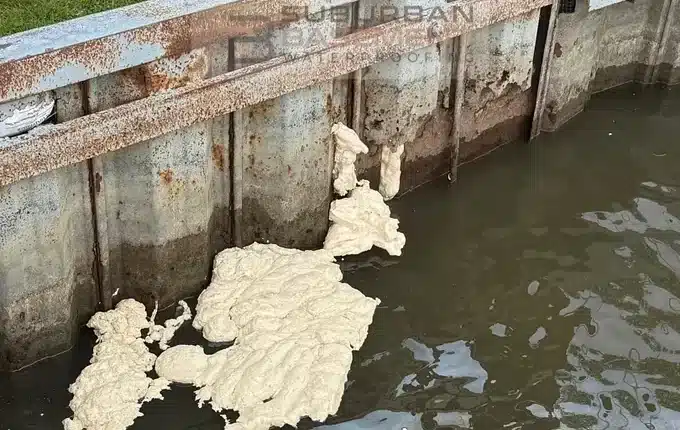
Foam surfacing through the holes in the seawall, contained by the turbidity barrier.
Polyurethane packed into the seams and holes in the wall.
Close up of the foam coming through the holes in the wall — the fill went right through.
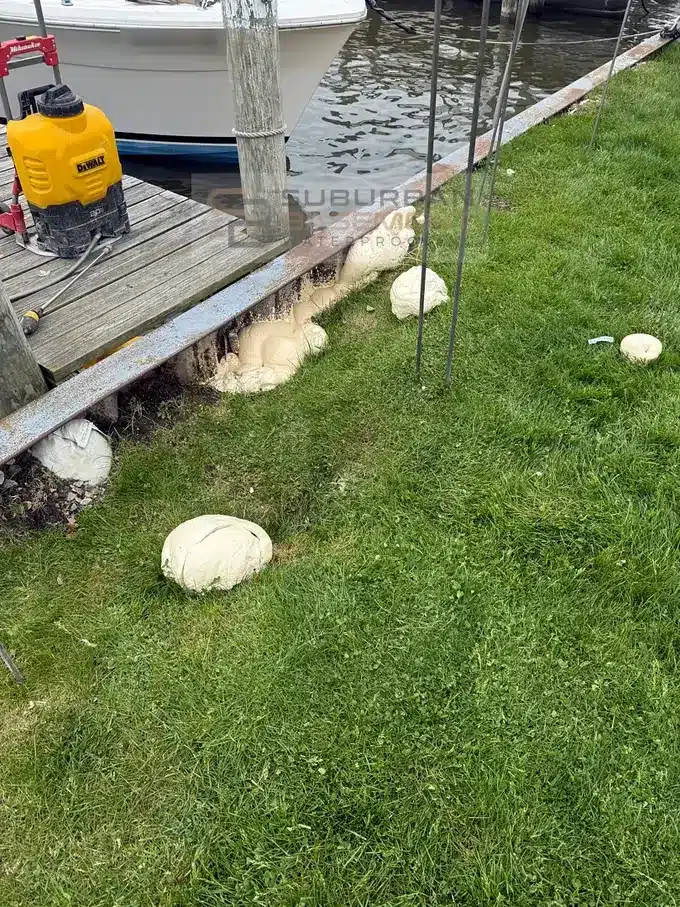
Injection lances along the seawall, with foam pushed up through the lawn and along the wall.
Foam at the top of the wall and coming through it, with the turbidity barrier in the water.
Most of the before photos were taken at the estimate, at the beginning of the spring thaw. The work was done roughly a month to six weeks later, which is why the grass is green in the later photos.
Questions From This Job
The homeowner kept adding stone and soil. Why didn’t that hold? He was filling voids left by two different things — the animal burrowing, and washout from lake water coming in through the holes in the seawall. Both kept working on it: the animal dug the new soil back out, and the water kept washing it out. Filling the voids and sealing the holes in the wall is what had to happen first, before new soil had anything solid to sit on.
Was this a safety issue or just a cosmetic one? A safety issue. The holes left by the burrowing and the erosion were a hazard to walk on — a soft spot underfoot at best, and at worst a foot going into a sinkhole and a severe injury.
Can a seawall that needs replacing still be stabilized? On this job, yes. The seawall will eventually need replacing — that was understood from the start. The injection stabilized the ground behind it, filled the voids, and sealed many of the holes in the wall — giving the homeowner additional years before a full replacement is needed.
Losing Soil Along a Canal, Lake, or Shoreline?
Call Suburban Basement Waterproofing